About Me

My photo
I am a wife to the most amazing husband (Eric) and a mother to 2 wonderful kids (Jessica and Evan). My family is my world. I have recently put my career as a medical assistant on hold to be a stay-at-home mom/wife. We want to raise kids with manners and still have a strong family, so I am always trying ideas to help make things easier on me (cleaning tips, organization, meal planning, crafts, etc.) I thought I would share them with everyone out there. So, please comment with your ideas, or if you have tried one posted on here (Did you like it?) I am always open to suggestions. I am also looking for money savers. It's my new passion now that there is only 1 income.
Showing posts with label DIY. Show all posts

Tuesday, July 17, 2012

Diaper Cake Motorcycle


I absolutely love making these for new moms and dads! They can be made for a boy or girl, or neutral.
Here I have posted the step-by-step instructions if you'd like to know how to make them yourself.
I also sell these for $50 each. Just let me know what specific colors you want.

WHAT YOU NEED:
50 diapers
3 washcloths
2 receiving blankets
1 package of travel wipes
1 bib
1 bottle
1 stuffed animal
ribbon
scissors
tape (preferably double sided)
yarn
rubberbands
A little patience...


STEP 1
Divide your diapers. Each tire will have 25.
Then lay them overlapping.


STEP 2
Take a rolled washcloth and use it as your guide, and roll the diapers into the tire. This is where you will need the patience. Don't worry if they aren't all even, you can adjust them later.


STEP 3
Secure the tire with a rubberband, then tie your yarn tightly around the rubberband.
Remove the rubberband and repeat steps 1-3 to make the 2nd tire.


STEP 4
Wrap your ribbon around each tire. Use the tape to secure it. Ribbon should cover the yarn.
Set the tires aside.


STEP 5
Take 1 of your receiving blankets and fold it so it is narrow. Secure the ends with rubberbands. This will make them easier to pull through the middle of the tires.


STEP 6
Pull the blanket through 1 tire leaving a little bit of slack at one end. Then pull it through the 2nd tire as shown.


STEP 7
Remove the rubberbands from the ends of the blanket and wrap 1 of the rubberbands around both ends together. This will become the middle of the motorcycle.


STEP 8
Add the bumpers with 2 washcloths. I used tape to secure them onto the ribbon.


STEP 9
Fold the 2nd receiving blanket as you did the first 1 and pull it through the front tire leaving equal slack on each side.
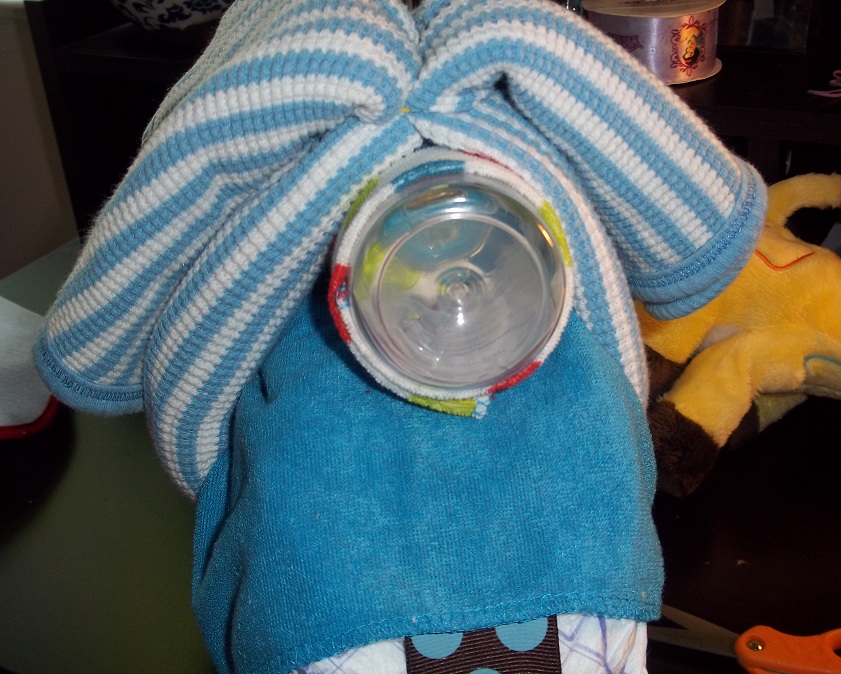
Wrap the last washcloth around the bottle. Place bottle on the front tire and wrap the receiving blanket around the bottle.
Secure with a rubberband.
Add 1 sock to each handlebar.
Place your pack of wipes, with the bib wrapped around it, in the center of the motorcycle.


STEP 10
Add your animal and you are finished

Tuesday, May 1, 2012

Homemade Carpet Shampoo


I know I haven't posted in a while, and there is a good reason for that. CRAZY BUSY FAMILY! I have been spring cleaning my butt off....well I wish my butt was smaller....anyways, back to the post.

I wanted to share with you all my homemade carpet shampoo. Shampoo in stores (even generic) is soooo expensive! I don't know about all of you, but our wallet is thin in this house. So here is a FANTASTIC recipe to get your carpets super clean!


First, I went through and spot treated any bad areas, and let me tell ya...there were a lot more than I thought (and we only have fish as pets, so use your imagination). People wearing their shoes in the house, and kids (ahem...and spouses) spilling God-knows-what, it was very polka-dotted....


Then, I added 1 Tbsp baking soda to the bottom of my container followed by 1/3 cup of vinegar.
Next, I added HOT water to the fill line.
Last, I added 1 Tbsp laundry detergent.

I have a standard carpet steamer:

This is what the shampoo sucked out of the carpets...it disgusts me! Needless to say, I did the carpets a second time. The 1st pic in this post is from the 2nd run.


Sunday, April 1, 2012

Bathtime Water Colors


My daughter loves colored bath water. But, the bath fizzes are pretty pricey. So here is another Pinterest inspired way to color bath water without the cost. It's also super fun!


You will need the following:
Ice cube tray (we got a cool fishy one)
Food coloring
Water
Freezer

Take your ice cube tray and fill it with water.


Next, take your food coloring and add 4-5 drops to each cube.


Freeze and you are all set. Add a cube to each bath and watch your child try to catch it as it turns the water fun colors.

Monday, March 26, 2012

Cardboard Creation

Well, the weather went from warm and wonderful, to windy and chilly. So the kids had to play inside today. To be honest, they were driving me nuts, and I knew it was just that they were sick of their indoor toys.

Looking around the house for something new and fun, I came across the box of broken down boxes in Evan's closet. I googled cardboard kid's crafts, and there were so many ideas. Jess wanted to build a ship so she could travel the ocean.

Here is how the ship turned out....

1st I had to cut the base box (the biggest one we had).

I then taped parts into place.

Next I cut and stacked boxes ontop of the base box, and in front of it, till it looked like a ship!

Finally we added the flag and the kids have been playing in this boat for hours!


Thursday, March 22, 2012

Weekly Menu Board

This is the post I have looked forward to for weeks! The idea of a menu board was 100% Pinterest inspired. But I wasn't able to find one that fit the space I had. So I sort of combined a few ideas into this board. I cannot wait to plan out our meals for next week this Sunday as I coupon!!!!!

It has taken me weeks to complete it, but don't get scared away, I didn't just work on this board. If I had, it probably would have taken me 2 days. So here is the step-by-step process.


First, I took the chalkboard I already had. (Plain and ugly...I know.)


Next I took stickers to make out the words "Menu" and "Shopping" and sealed them with Mod Podge. This way I can wipe the board clean with a wet rag since it is in my kitchen.  I also painted the trim a green color.


As the painted trim was drying, I took 5 wooden clothes pins and painted them with nail polishes.


As those dried, I took an empty bandaid box and trimmed it to the size I wanted.


I then covered the bandaid box.

After the clothes pins were dry, I used my hotglue gun and attached the pins where I wanted them. I only used 5, because we usually end up eating out 1 day on the weekend and eat at my in-laws the other day of the weekend. So I tend to not plan on cooking on weekends.


Next, I decided to print up the most common meals in our house with all of the ingredients need to make the meal on the back of the card. This way, when I make out my shopping list I will know all the ingredients I need to buy.
After they printed, I lamenated them so I would be able to wipe off anything that would get on them.


Finally, I assembled my board with the menu card holder, a pad of paper, and a sharpie holder (made out of ribbon). I used velcro to attach the pad of paper and card holder, and hot glue to attach the pen holder.


And my menu board was complete!