
About Me

My photo
I am a wife to the most amazing husband (Eric) and a mother to 2 wonderful kids (Jessica and Evan). My family is my world. I have recently put my career as a medical assistant on hold to be a stay-at-home mom/wife. We want to raise kids with manners and still have a strong family, so I am always trying ideas to help make things easier on me (cleaning tips, organization, meal planning, crafts, etc.) I thought I would share them with everyone out there. So, please comment with your ideas, or if you have tried one posted on here (Did you like it?) I am always open to suggestions. I am also looking for money savers. It's my new passion now that there is only 1 income.
Showing posts with label Crafting. Show all posts

Tuesday, July 17, 2012

Diaper Cake Motorcycle


I absolutely love making these for new moms and dads! They can be made for a boy or girl, or neutral.
Here I have posted the step-by-step instructions if you'd like to know how to make them yourself.
I also sell these for $50 each. Just let me know what specific colors you want.

WHAT YOU NEED:
50 diapers
3 washcloths
2 receiving blankets
1 package of travel wipes
1 bib
1 bottle
1 stuffed animal
ribbon
scissors
tape (preferably double sided)
yarn
rubberbands
A little patience...


STEP 1
Divide your diapers. Each tire will have 25.
Then lay them overlapping.


STEP 2
Take a rolled washcloth and use it as your guide, and roll the diapers into the tire. This is where you will need the patience. Don't worry if they aren't all even, you can adjust them later.


STEP 3
Secure the tire with a rubberband, then tie your yarn tightly around the rubberband.
Remove the rubberband and repeat steps 1-3 to make the 2nd tire.


STEP 4
Wrap your ribbon around each tire. Use the tape to secure it. Ribbon should cover the yarn.
Set the tires aside.


STEP 5
Take 1 of your receiving blankets and fold it so it is narrow. Secure the ends with rubberbands. This will make them easier to pull through the middle of the tires.


STEP 6
Pull the blanket through 1 tire leaving a little bit of slack at one end. Then pull it through the 2nd tire as shown.


STEP 7
Remove the rubberbands from the ends of the blanket and wrap 1 of the rubberbands around both ends together. This will become the middle of the motorcycle.


STEP 8
Add the bumpers with 2 washcloths. I used tape to secure them onto the ribbon.


STEP 9
Fold the 2nd receiving blanket as you did the first 1 and pull it through the front tire leaving equal slack on each side.
Wrap the last washcloth around the bottle. Place bottle on the front tire and wrap the receiving blanket around the bottle.
Secure with a rubberband.
Add 1 sock to each handlebar.
Place your pack of wipes, with the bib wrapped around it, in the center of the motorcycle.

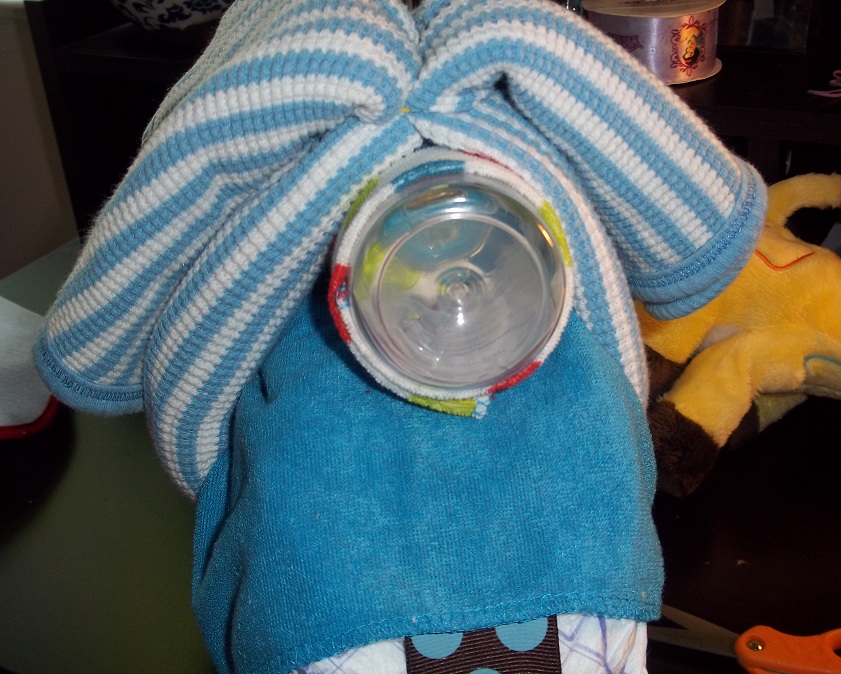


STEP 10
Add your animal and you are finished

Thursday, March 22, 2012

Recycled Scrap Paper Box

I love taking things that I would normall throw away and make something neat out of it.

This was super easy to make and looks adorable on my desk. Also, where I normally have scrap paper laying around all over, I now have a place for it all.


Take an empty box the size you want your holder to be. (I took an empty sweetener box.)
Cut the box to the height you want.


Cover the box with whatever design you like. (I have been dying to use this pink paper.) I then sealed the box to keep it looking nice in the future. Let dry, and your box is complete!


Wednesday, March 21, 2012

Bead Bowl

Another Pinterest-inspired project.

This was super fun to make with Jessica. 

PLEASE make sure a grown-up does any part that requires the oven!!!!!!!!!


First, gather all of your supplies. You will need the following:
Meltable beads
Oven saft bowl or dish
Cooking spray
Timer


Spray your bowl with cooking spray


Pour in your beads (Jessica's favorite part)


Press beads so the sides are a single layer


Bake in 400 degree oven for 10-20 minutes (until beads are melted)
LET A GROWN-UP DO THIS


Remove from oven and let cool for 10 minutes
LET A GROWN-UP DO THIS


Remove your bowl and wash with soapy water before use. I don't recomment putting liquid in them as there may still be some holes. I used this one for a fruit bowl. We made a square bowl to hold my sweetener packets next to my coffee pot.

Friday, March 16, 2012

DIY Bath Paints


Both jess and Evan love their bathtime. Especially when there are fun toys in their with them. Evan is a tad little, but Jessica loves anything that adds to her bath (bubbles, colored fiz tabs, bath crayons, bath paints, etc.). But that stuff is really expensive....until now! Making your own bath paints is so cheap and easy, it's silly not to. Not to mention Jess had a blast making them with me. Just follow these instructions:

Ingredients
1/2 cup body wash
Cornstarch (we used 4-5 Tbsp)
Food coloring


Pour 1/2 cup of body wash in each container (depending on how many colors you are making).


Then add the cornstarch 1 Tbsp at a time. We ended up using 4 or 5 Tbsp's for each batch.


You want a thick consistancy, but not dough. Kind of like this...


Next, add your food coloring. We used 4 drops, but next time I think we will use a little more.


And you are all done!

Monday, March 12, 2012

1st Pin It! Party

Yesterday was my very 1st Pin It! party and we all had a blast!!!! Everyone brought something to create and a dish to share with a recipe from Pinterest. The food was outstanding and projects came out great. We are going to try to have one of these each month. Here are some pics...

Trying to get my letters to print on my Cricut.

Working on flower wall art. It turned out so good, AND I got the left over petals to create my own! (We have the same bedroom colors)

Cutting strips of fabric to make jersey bracelets and anklets. The are so soft and stretchy!!!!

Painting the letters for her scrabble wall art.

The little inspectors came by to see how things were going. Looks like she needed their help.

Our mini-pinners!!!!

Working hard on her crafting.

For the recipes to all the food made at the Pin It! party, click here!